A Beginner’s Guide to Makeup Application: Unveiling the Art of Enhancement
Related Articles: A Beginner’s Guide to Makeup Application: Unveiling the Art of Enhancement
Introduction
In this auspicious occasion, we are delighted to delve into the intriguing topic related to A Beginner’s Guide to Makeup Application: Unveiling the Art of Enhancement. Let’s weave interesting information and offer fresh perspectives to the readers.
Table of Content
A Beginner’s Guide to Makeup Application: Unveiling the Art of Enhancement

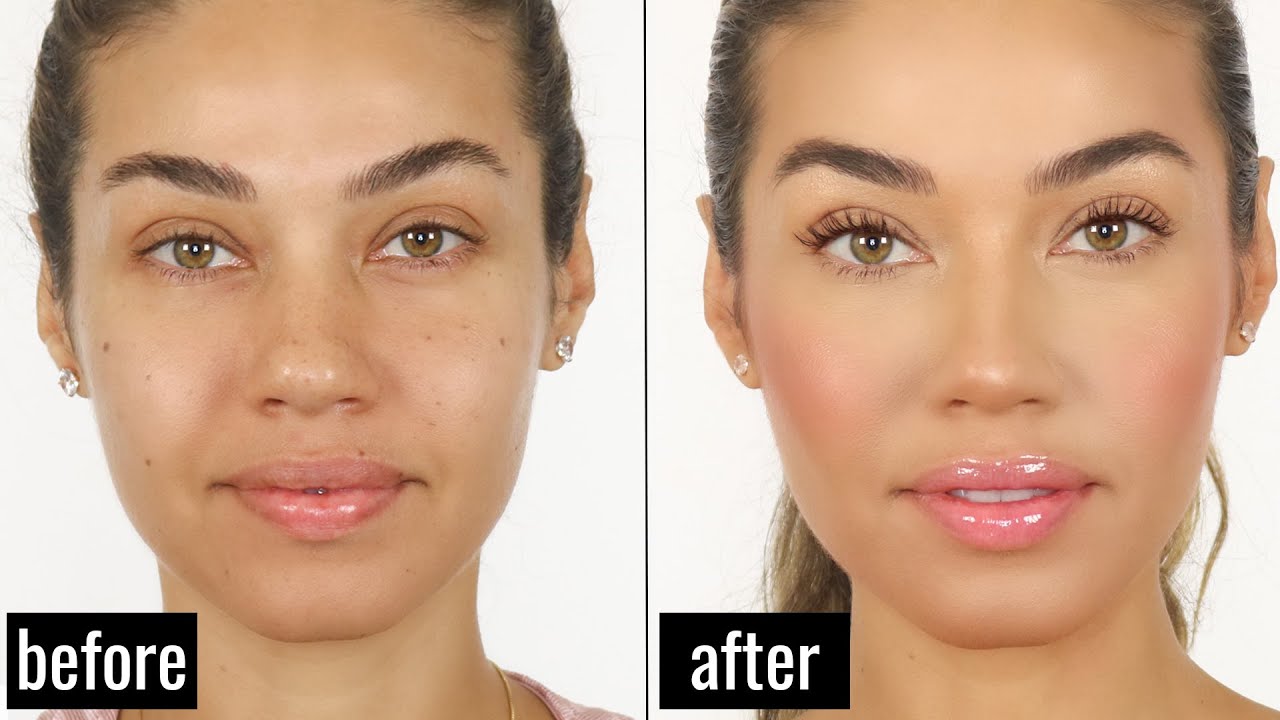
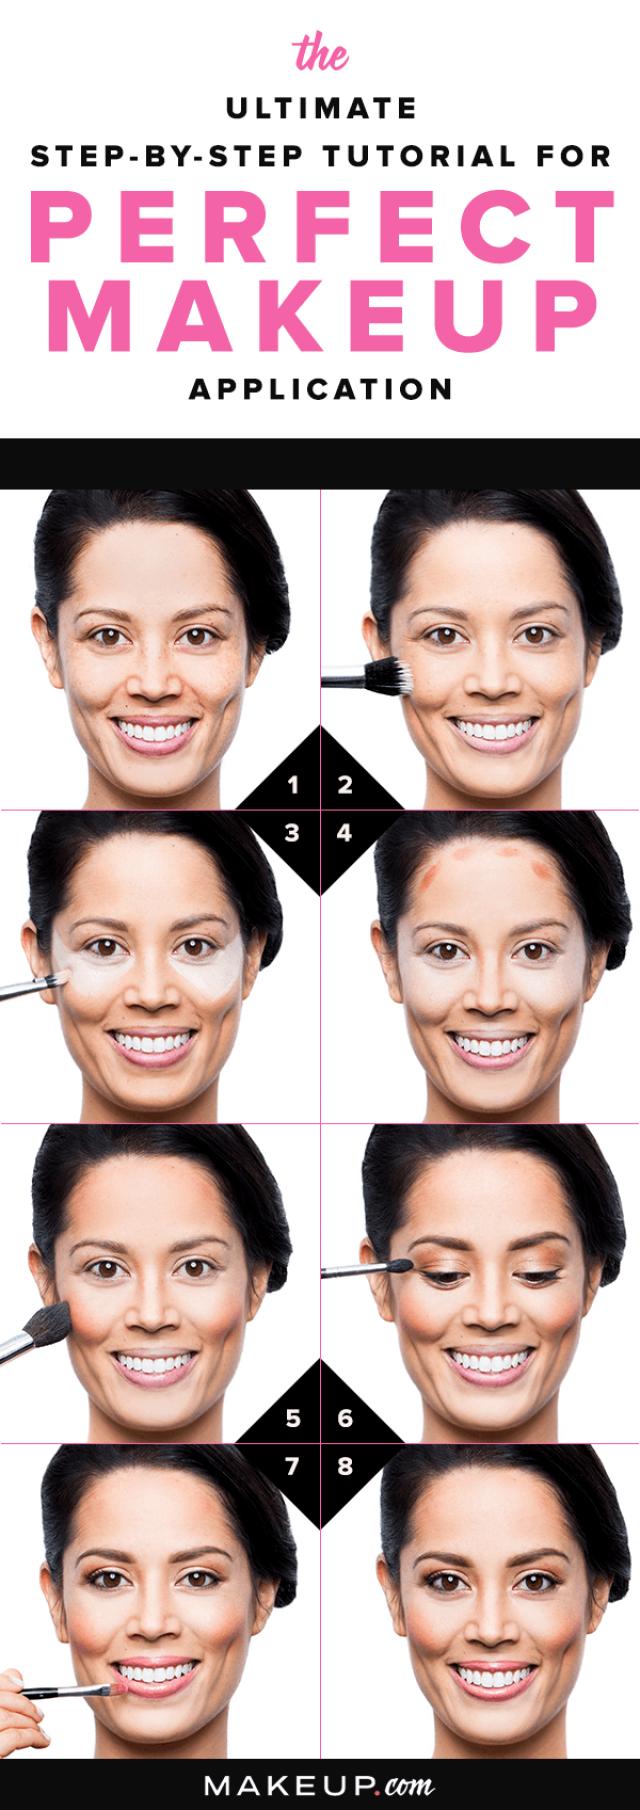
Makeup is a powerful tool for self-expression, allowing individuals to accentuate their natural features, experiment with different looks, and boost their confidence. While the world of makeup can seem overwhelming for beginners, mastering the fundamentals is achievable with a little guidance and practice. This comprehensive guide will break down the essential steps of makeup application, empowering beginners to navigate the world of cosmetics with ease and confidence.
Step 1: Preparing the Canvas: Skincare as the Foundation
Before diving into the world of colors and textures, it is paramount to create a smooth and even canvas. A well-prepped complexion will ensure makeup glides on seamlessly and lasts throughout the day. This involves a simple yet essential skincare routine:
- Cleansing: Removing dirt, oil, and impurities is the first step in prepping the skin. Choose a gentle cleanser suitable for your skin type, whether it be oily, dry, combination, or sensitive.
- Toning: Toners help balance the skin’s pH level, tighten pores, and prepare the skin for subsequent products. Opt for an alcohol-free toner to avoid drying out the skin.
- Moisturizing: Hydration is crucial for healthy-looking skin and helps makeup apply smoothly. Select a moisturizer tailored to your skin type, ensuring it absorbs fully before applying makeup.
- Sunscreen: Protecting the skin from harmful UV rays is a vital step in any skincare routine. Apply a broad-spectrum sunscreen with an SPF of 30 or higher daily, even on cloudy days.
Step 2: Priming for Perfection: The Base for a Flawless Finish
A primer acts as a barrier between the skin and makeup, creating a smooth surface for seamless application. It helps to minimize the appearance of pores, fine lines, and imperfections, prolonging the wear of makeup throughout the day.
-
Types of Primers: Primers are available in various formulas, each catering to specific concerns:
- Mattifying primers: Ideal for oily skin, these primers control shine and absorb excess oil.
- Hydrating primers: Perfect for dry skin, these primers add moisture and create a dewy finish.
- Illuminating primers: These primers contain light-reflecting particles, adding a subtle glow to the skin.
- Color-correcting primers: Available in various shades, these primers help neutralize redness, discoloration, or sallowness.
Step 3: The Foundation of Confidence: Achieving an Even Complexion
Foundation is the cornerstone of makeup, providing an even base for subsequent products. It helps to conceal blemishes, redness, and uneven skin tone, creating a flawless canvas.
- Choosing the Right Foundation: Selecting the right foundation shade is crucial for a natural-looking finish. Test foundation shades on your jawline, blending into your skin to find the closest match.
-
Application Techniques:
- Fingers: This method offers warmth and allows for seamless blending.
- Beauty Blender: This sponge helps create a natural, airbrushed finish.
- Foundation Brush: This tool provides precise application and controlled blending.
- Setting the Foundation: To ensure the foundation stays in place, set it with a translucent powder. This helps to control shine and prevent creasing.
Step 4: Concealing Imperfections: Erasing Blemishes and Dark Circles
Concealer is designed to target specific imperfections, providing a more targeted approach to coverage. It helps to hide dark circles, blemishes, and redness, creating a flawless and radiant complexion.
- Choosing the Right Concealer: Select a concealer shade that matches your skin tone or is one shade lighter for highlighting.
-
Application Techniques:
- Triangle Technique: Apply concealer in an inverted triangle shape under the eyes, blending upwards towards the temples to brighten and lift.
- Dabbing Technique: Use a small brush or your fingertip to dab concealer directly onto blemishes or areas requiring additional coverage.
- Blending is Key: Blend the concealer seamlessly into the surrounding skin using a brush, sponge, or fingertips.
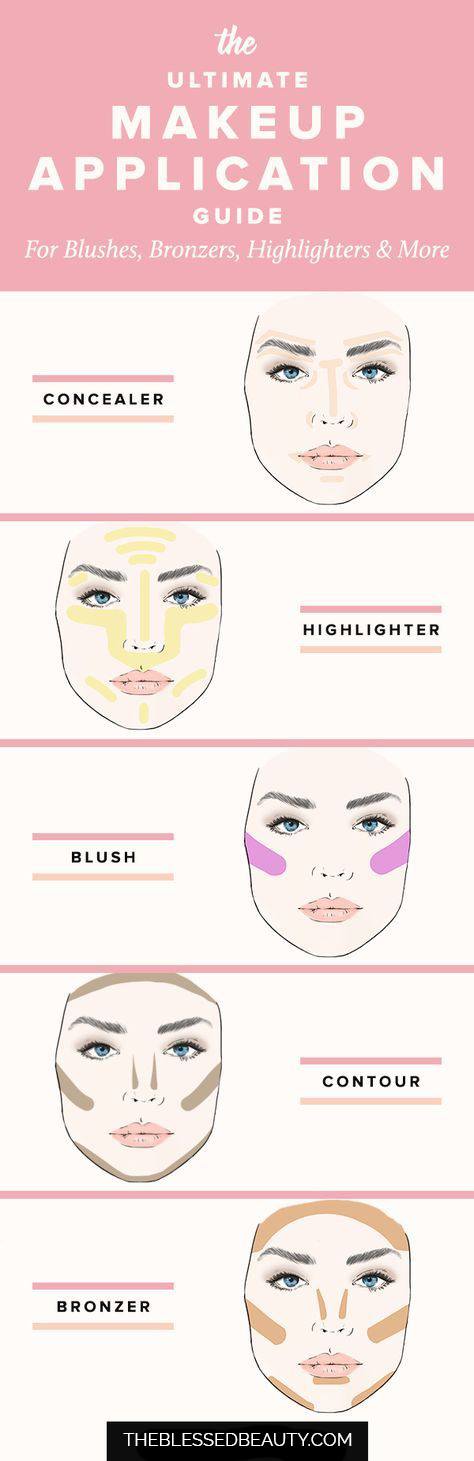
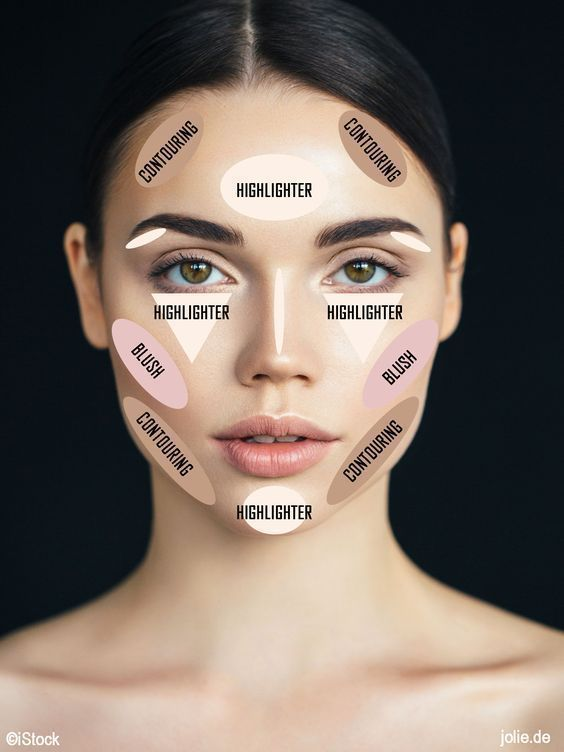
Step 5: Defining Features: The Power of Contouring and Bronzing
Contouring and bronzing are techniques that add depth and dimension to the face, enhancing its natural shape and structure. They help to sculpt the cheekbones, define the jawline, and create a more sculpted appearance.
- Contouring: Use a contouring powder or cream that is one to two shades darker than your skin tone. Apply it to the hollows of the cheeks, along the sides of the nose, and under the jawline.
- Bronzing: Bronzer adds warmth and a natural-looking tan to the complexion. Apply it to the forehead, cheekbones, and bridge of the nose.
- Blending is Crucial: Blend the contour and bronzer seamlessly into the surrounding skin, avoiding harsh lines.
Step 6: Adding Radiance: Highlighting and Illuminating the Face
Highlighter adds a touch of luminosity to the face, emphasizing certain features and creating a radiant glow. It helps to brighten the cheekbones, brow bone, and cupid’s bow, adding dimension and highlighting the face’s natural contours.
- Choosing the Right Highlighter: Highlighters come in various finishes, from subtle shimmer to intense sparkle. Opt for a formula that complements your skin tone and desired level of luminosity.
-
Application Techniques:
- Fan Brush: Use a fan brush to apply highlighter strategically to the high points of the face, creating a subtle glow.
- Fingertips: Apply highlighter with your fingertips for a more natural, blended effect.
- Less is More: Start with a small amount of highlighter and gradually build up the intensity as desired.
Step 7: Shaping the Brows: Framing the Face with Precision
Eyebrows play a crucial role in framing the face and defining its overall expression. Properly shaped and filled eyebrows can enhance the eyes, create a more balanced look, and elevate the entire makeup look.
-
Brow Products:
- Brow Pencil: Provides precise definition and allows for hair-like strokes.
- Brow Powder: Creates a softer, more natural finish.
- Brow Gel: Sets brows in place and adds definition.
-
Brow Shaping Techniques:
- Defining the Shape: Use a brow pencil to define the natural arch of the eyebrow.
- Filling in Sparse Areas: Use brow powder or pencil to fill in any sparse areas, creating a fuller and more defined brow.
- Setting the Brows: Use a brow gel to set the brows in place, preventing them from smudging or fading throughout the day.
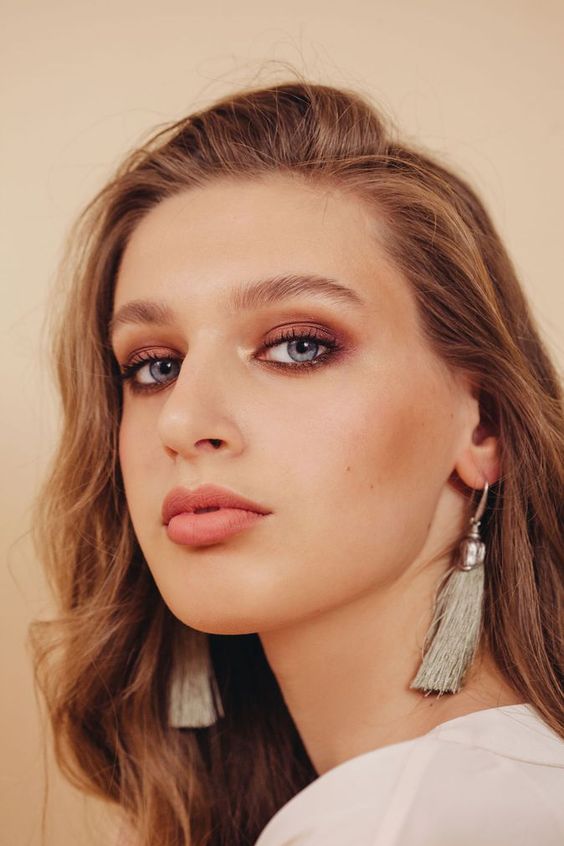
Step 8: Enhancing the Eyes: Exploring Eyeshadows and Liners
Eyeshadows and eyeliners are powerful tools for creating a range of eye looks, from subtle and natural to dramatic and bold. They can enhance the eyes, add depth, and create a captivating focal point.
-
Eyeshadow Application:
- Blending is Key: Use a blending brush to seamlessly transition between different eyeshadow shades, creating a smooth and polished look.
- Crease Technique: Apply a darker shade to the crease of the eyelid to add depth and definition.
- Lid Color: Use a lighter shade on the eyelid to brighten and illuminate the eye area.
-
Eyeliner Application:
- Liquid Liner: Creates a precise and dramatic line, ideal for winged liner looks.
- Pencil Liner: Provides a softer, more diffused line, suitable for smudging and creating smoky eye looks.
- Gel Liner: Offers a balance between precision and smudgeability, allowing for various eye looks.
Step 9: Opening Up the Eyes: Mastering Mascara and Lash Extensions
Mascara is a staple makeup product that adds volume, length, and definition to the lashes, opening up the eyes and creating a more awake and alluring look.
-
Types of Mascara:
- Volumizing Mascara: Adds thickness and fullness to the lashes.
- Lengthening Mascara: Extends the lashes, creating a wider-eyed effect.
- Curling Mascara: Lifts and curls the lashes, creating a more open and lifted look.
-
Application Technique:
- Wiggle the Wand: Wiggle the mascara wand from the base of the lashes to the tips, ensuring each lash is coated evenly.
- Multiple Coats: Apply multiple coats of mascara for added volume and definition.
- Lash Extensions: For a more dramatic and long-lasting effect, consider lash extensions. These are individual lashes applied to the natural lashes, creating a fuller and more glamorous look.
Step 10: Adding a Touch of Color: The Power of Lipstick and Lip Gloss
Lipstick and lip gloss are the finishing touches to any makeup look, adding a pop of color and defining the lips. They can create a bold statement or enhance the natural lip color, complementing the overall makeup look.
-
Choosing the Right Lipstick:
- Matte Lipstick: Creates a long-lasting, non-shiny finish.
- Satin Lipstick: Provides a smooth, semi-matte finish with a touch of sheen.
- Glossy Lipstick: Adds shine and dimension to the lips.
- Lip Liner: Use a lip liner to define the lips, prevent lipstick from bleeding, and create a more precise application.
- Lip Gloss: Apply lip gloss over lipstick for a more glamorous and shiny finish.
FAQs by Steps to Apply Makeup for Beginners
Step 1: Skincare as the Foundation
Q: What type of cleanser should I use?
A: Choose a cleanser suitable for your skin type. Oily skin benefits from a gel or foaming cleanser, dry skin prefers a creamy cleanser, and combination skin may need a dual-action cleanser.
Q: Do I need to use toner?
A: While not essential, toners can help balance the skin’s pH, tighten pores, and prepare the skin for subsequent products.
Step 2: Priming for Perfection
Q: Is primer necessary?
A: Primers are not essential but can help create a smoother surface for makeup application, minimize the appearance of pores, and prolong the wear of makeup.
Q: How do I know which primer is right for me?
A: Consider your skin type and concerns. Oily skin benefits from mattifying primers, dry skin prefers hydrating primers, and those seeking a glow can opt for illuminating primers.
Step 3: The Foundation of Confidence
Q: How do I find the right foundation shade?
A: Test foundation shades on your jawline, blending into your skin to find the closest match.
Q: What is the best way to apply foundation?
A: Fingers, beauty blenders, and foundation brushes are all effective application methods. Choose the method that you find most comfortable and provides the desired finish.
Step 4: Concealing Imperfections
Q: How do I choose the right concealer shade?
A: Select a concealer shade that matches your skin tone or is one shade lighter for highlighting.
Q: How do I apply concealer under my eyes?
A: Apply concealer in an inverted triangle shape under the eyes, blending upwards towards the temples to brighten and lift.
Step 5: Defining Features
Q: What is the difference between contouring and bronzing?
A: Contouring uses a darker shade to sculpt and define features, while bronzing adds warmth and a natural-looking tan.
Q: How do I avoid harsh lines when contouring and bronzing?
A: Blend the contour and bronzer seamlessly into the surrounding skin, using a brush or sponge.
Step 6: Adding Radiance
Q: Where should I apply highlighter?
A: Apply highlighter to the high points of the face, such as the cheekbones, brow bone, and cupid’s bow.
Q: What type of highlighter should I use?
A: Opt for a highlighter that complements your skin tone and desired level of luminosity.
Step 7: Shaping the Brows
Q: How do I shape my eyebrows?
A: Use a brow pencil to define the natural arch of the eyebrow. Fill in any sparse areas with brow powder or pencil, and set the brows in place with a brow gel.
Q: What is the best way to fill in my eyebrows?
A: Use small, hair-like strokes to mimic the natural growth of your eyebrows.
Step 8: Enhancing the Eyes
Q: What is the best way to blend eyeshadow?
A: Use a blending brush to seamlessly transition between different eyeshadow shades, creating a smooth and polished look.
Q: How do I apply eyeliner?
A: Liquid liner creates a precise line, pencil liner is softer, and gel liner offers a balance between precision and smudgeability.
Step 9: Opening Up the Eyes
Q: How do I apply mascara?
A: Wiggle the mascara wand from the base of the lashes to the tips, ensuring each lash is coated evenly. Apply multiple coats for added volume and definition.
Q: What are lash extensions?
A: Lash extensions are individual lashes applied to the natural lashes, creating a fuller and more glamorous look.
Step 10: Adding a Touch of Color
Q: What is the difference between matte and glossy lipstick?
A: Matte lipstick creates a long-lasting, non-shiny finish, while glossy lipstick adds shine and dimension.
Q: How do I apply lipstick?
A: Use a lip liner to define the lips and prevent lipstick from bleeding. Apply lipstick evenly, starting from the center of the lips and blending outwards.
Tips by Steps to Apply Makeup for Beginners
Step 1: Skincare as the Foundation
- Cleanse twice daily: Morning and night cleansing helps remove impurities and prepare the skin for makeup.
- Exfoliate regularly: Exfoliating once or twice a week helps remove dead skin cells, revealing smoother and brighter skin.
- Hydrate from within: Drink plenty of water to keep the skin hydrated and supple.
Step 2: Priming for Perfection
- Choose a primer based on your skin type: Oily skin benefits from mattifying primers, dry skin prefers hydrating primers, and those seeking a glow can opt for illuminating primers.
- Apply primer evenly: Ensure the primer is spread evenly across the face, creating a smooth base for makeup.
- Allow primer to dry completely: Before applying foundation, allow the primer to dry completely to prevent smudging.
Step 3: The Foundation of Confidence
- Match your foundation to your skin tone: Test foundation shades on your jawline, blending into your skin to find the closest match.
- Use a foundation brush or sponge: These tools help blend foundation seamlessly, creating a natural finish.
- Set your foundation with powder: This helps to control shine and prevent creasing.
Step 4: Concealing Imperfections
- Apply concealer sparingly: A little concealer goes a long way. Start with a small amount and build up coverage as needed.
- Blend concealer seamlessly: Use a brush, sponge, or fingertips to blend concealer into the surrounding skin, avoiding harsh lines.
- Set concealer with powder: This helps to prevent creasing and ensure the concealer stays in place.
Step 5: Defining Features
- Start with a light hand: Begin with a small amount of contour and bronzer, gradually building up the intensity as desired.
- Blend, blend, blend: Seamless blending is key to creating a natural and sculpted look.
- Use a brush with a soft, fluffy texture: This helps to blend contour and bronzer smoothly.
Step 6: Adding Radiance
- Apply highlighter strategically: Focus on the high points of the face, such as the cheekbones, brow bone, and cupid’s bow.
- Choose a highlighter that complements your skin tone: Opt for a highlighter that adds a subtle glow without being too overpowering.
- Less is more: Start with a small amount of highlighter and gradually build up the intensity as desired.
Step 7: Shaping the Brows
- Use a brow pencil to define the shape: Follow the natural arch of your eyebrow, creating a clean and defined shape.
- Fill in sparse areas with brow powder or pencil: Use small, hair-like strokes to mimic the natural growth of your eyebrows.
- Set brows in place with a brow gel: This helps to prevent smudging and keep brows looking neat and defined.
Step 8: Enhancing the Eyes
- Use a blending brush to create seamless transitions: Blend eyeshadow shades together, creating a smooth and polished look.
- Experiment with different eyeshadow colors and techniques: Explore various eyeshadow palettes and techniques to find what suits your style.
- Apply eyeliner carefully: Start with a thin line and gradually build up the thickness as desired.
Step 9: Opening Up the Eyes
- Wiggle the mascara wand from the base to the tips: This helps to coat each lash evenly and prevent clumping.
- Apply mascara in multiple coats: Build up the volume and definition of your lashes with multiple coats of mascara.
- Curl your lashes before applying mascara: This helps to create a more open and lifted look.
Step 10: Adding a Touch of Color
- Use a lip liner to define the lips: This helps to prevent lipstick from bleeding and creates a more precise application.
- Apply lipstick evenly: Start from the center of the lips and blend outwards, ensuring the lipstick is evenly distributed.
- Choose a lipstick color that complements your skin tone and style: Experiment with different lipstick shades to find what suits you best.
Conclusion
Mastering the art of makeup application is a journey of self-discovery and experimentation. By following these steps and incorporating the provided tips, beginners can confidently navigate the world of cosmetics and unlock the transformative power of makeup. Remember, practice makes perfect, and with time and patience, you’ll develop your unique makeup style and express your individuality through the beauty of makeup.


Closure
Thus, we hope this article has provided valuable insights into A Beginner’s Guide to Makeup Application: Unveiling the Art of Enhancement. We hope you find this article informative and beneficial. See you in our next article!